serving up the harvest

An Eggplant Garden

Some of the eggplant are in pots.
We planted an eggplant garden this year.  Twenty-six eggplant plants, nine varieties.  There are Japanese eggplants, Chinese eggplants, Thai eggplants, Italian globe eggplants.  There are Little Fingers, Black Beauties, Oriental Longs, Kermits, Rosa Bianca, Pingtung Long, and Oriental Gourmet. We are not growing any African eggplant, because these are too tropical for our climate. 


Eggplants are an Old World nightshade, unlike the tomato, chile, and potato, also nightshades but of New World origins.  The earliest records of eggplant in Chinese and Sanskrit date back 2000 years, according to Elizabeth Schneider’s excellent reference book, Vegetables from Amaranth to Zucchini.  She explains that the eggplant was introduced to Japan in the eight century and to Europe in the thirteenth.  The variety that was introduced to North America was indeed white and egg-shaped and valued more as an ornamental than a vegetable.  Which may explain why Americans have been so slow to adopt eggplants.

But thanks to the influence of immigrants and their cuisines, Americans are now growing some sixty-six different varieties of the eggplant berry (eggplant is a berry), of which we are growing a sampling.  You’d think we’d be planning to do some seed saving, but the fact is, most of these varieties are hybrids.  And, it seems that eggplant cross-pollinates quite readily, so any seeds we saved would be unlikely to breed true.  But from a cook’s point of view, I wouldn’t have wanted to be a seed saver.  Because the dreaded bitterness for which the eggplant is known and despised is a function of fully developed seeds.

This row of eggplant is in front of a trellis of pole beans.
Indeed, much of what I learned about cooking eggplant is just plain wrong, as I have come to appreciate since growing my own.  Eggplant fresh from the garden doesn’t have to be peeled, unlike some supermarket specimens that have been waxed to extend its shelf life.  And a fresh, young eggplant doesn’t require salting to drain away bitter juices, because it isn’t bitter.   Finally, eggplant do much better sitting on a kitchen counter than being placed in the refrigerator.  At 50°F or lower, the eggplant flesh will turn brown.  

It mystifies me when someone tells me that don’t like eggplant, because the eggplant flesh is mild, hardly something that should inspire a distaste.  But oh, it is a sponge for flavors, which is why we can’t get enough of my Soy-Sesame Eggplant, sometimes served up plain (with rice, of course) and sometimes combined with a stir-fried meat.  (Just prepare the Soy-Sesame Eggplant and set it aside to marinate in its dressing.  Stir-fry matchsticks of chicken, pork, beef, or whole shrimp and dump in the eggplant at the end.)

The original version works with grilled or broiled eggplant.  It's all good.  


Soy-Sesame Eggplant

Soy-Sesame Garlic
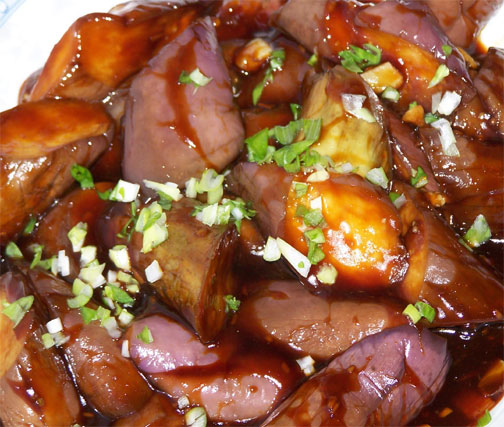
When you are looking for a make-ahead vegetable dish that can be served at room temperature, consider the eggplant.  In this case, slices of eggplant are grilled or broiled, then combined with a spicy marinade featuring soy sauce and Chinese chili paste with garlic.  It’s not the most beautiful dish in the world, but a scattering of cilantro and scallions brightens the dark colors of soy and eggplant.  The flavor is intense and delicious.

Three pounds of eggplant is about two large globe eggplant.  This dish works well with any variety of eggplant.  If the eggplant is long and curved, like some varieties are, it may be more convenient to slice the eggplant horizontally.  


Eggplant

3 pounds eggplant, cut into cubes

3 tablespoons peanut or canola oil

Marinade

5 tablespoons soy sauce

2 tablespoons sesame oil

2 tablespoons mirin, rice wine, or sake

1 tablespoon rice vinegar

1 tablespoon chili paste with garlic

1 tablespoon sugar

2 garlic cloves, minced

Garnish

3 scallions, whites and tender greens, finely chopped

3 tablespoons fresh chopped cilantro

1.  Heat a wok over very high heat.  Add the oil and heat until it shimmers.  Add the eggplant and stir-fry until cooked through, about 5 minutes.  Transfer to a medium-sized bowl.

2, Combine the soy sauce, sesame oil, mirin, vinegar, chili paste, sugar, garlic, and in a small bowl.  Mix well.  Pour over the eggplant and toss to mix.

3.  Let stand at least 30 minutes to allow the eggplant to absorb the flavors of the marinade.  You can hold this dish in the refrigerator for up to day, but bring to room temperature. Just before serving, sprinkle with the scallions and cilantro.    

  
Adapted From Serving Up the Harvest by Andrea Chesman.  ©2007, 2009 Andrea Chesman.  All rights reserved.


Onions and More Onions

 Turns out 50 pounds of onions will probably only last through January

I bought 50 pounds of unsorted onions from Elmer Farm, my CSA farmers this fall.  I figured unsorted meant that the onions varied in size, but I didn’t know that they would also vary in likelihood of storing well.

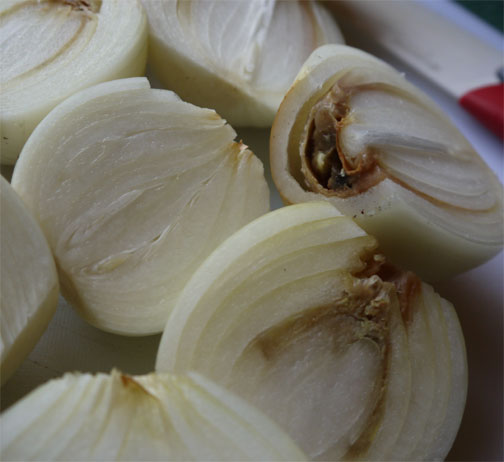
Some of the onions didn't cure properly. 

Some of the onions had soft necks where the leaves had not fully dried.  Each layer of an onion is actually a leaf, and some leaves dry better than others—no matter how well they are handled post harvest.  So before storing, I had to sort the onions, setting aside those with thick and/or soft necks for using immediately. Turns out, about 15 pounds were destined to be used quickly.  Any by using quickly, I mean, discarding any slimy brown layers, but utilizing the rest of the onion.

 I could feel the onions with soft necks, alerting me to the fact they wouldn't store well.

You’d think that would be a daunting situation, but it wasn’t.  First, 6 pounds or so went into making Rosemary Onion Confit (see March Madness 2012).  Some went into the dehydrator, some went into a beef and onion stir-fry with black bean sauce, some went into onion soup.  And the rest were fried—not something I recommend doing but often, what a wonderful once-a-year treat!


About the stir-fry, I followed my basic recipe for a stir-fry (see Serving Up the Harvest, pages 35-35), using beef and 8 cups of slivered onions, substituting black bean sauce and 1 tablespoon chopped fermented black beans for the oyster sauce, and omitting the broth and cornstarch.  When I returned the stir-fried beef to the wok with the seared onions, I added 6 sliced scallions.  The only trick with an onion-based stir-fry is to use a really, really hot wok and get a good sear on the onions.

 Beef and Onion Stir-Fry with Black Bean Sauce

For the onion soup, trust me, you don’t need a recipe.  Also, you don’t need to serve it with a cheese layer on top—you can melt cheese on toast under the broiler and then ladle the soup on top.  It is much easier to eat that way.  To make onion soup, just slice several pounds of onions; you’ll want 8 to 12 cups of sliced onions.  Then pour beef broth on top—could be homemade from roasted soup bones, could be from bouillon, or canned—using enough to cover the onions, 8 to 12 cups, and simmer for about 30 minutes.  Season with soy sauce, which has that umami quality and darkens the color of the broth nicely, and pepper.

 Ladling onion soup onto cheese toasts.

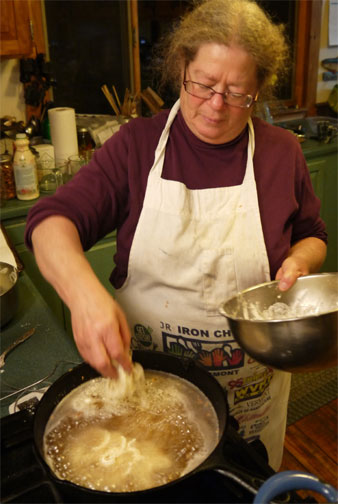
And finally, the fried onion rings.  I went for a simple seasoned flour for a coating, dipping the onions first in buttermilk, then in flour, then into the hot onion in batches until browned.  They turned out great—crunchy, sweet, salty—and maybe just a little too good.  So as with all good seasonal foods, enjoy fried onions as a celebration of the harvest, and don’t worry if your onions haven’t cured as well as you would have liked.

 Deep frying onions.

Oh, and where are all those onions stored?  In an unheated upstairs closet.  I don’t know what people do who have heat in the upstairs bedrooms. An unheated closet is the perfect place to store onions. How do they store their onions?  How do they sleep?

Dinner in Minutes

Chard and Raviol 

Life is busy.  Then it gets busier.  Tomatoes need canning, onions and carrots need harvesting, kids need lots of attention as they head back to school, summer has taken a toll on the cleanliness of the house, warmer clothes need digging out.  Then there is your usual busy life.  It adds up.


How perfect then, to have a healthy, veggie-rich dinner that every will enjoy.  This is one of my favorite dishes to make when time is short.  In the spring, substitute arugula or spinach for the chard; in the winter substitute kale or cabbage – and adjust times accordingly.  For as long as the harvest lasts, we are all happy to eat lots of Swiss chard.

 The garden keeps producing more chard.

A drizzle of a reduction of balsamic vinegar – balsamic vinegar and a little sugar cooked down until syrupy – makes elevates the dish to make it a dinner for special occasions.


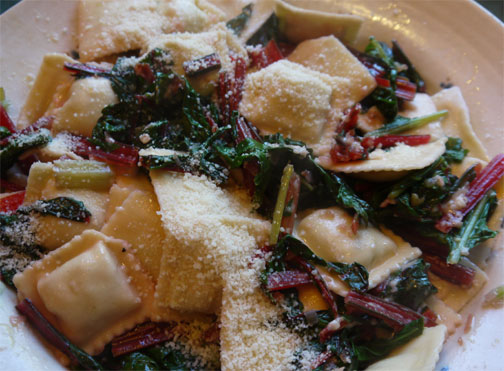
Chard and Ravioli

Serves 4


A magic formula: Take two big bunches of chard from the garden. Combine with pantry and freezer staples. The result—so much greater than the sum of its parts—is an incredibly delicious, healthful one-dish vegetarian meal. It doesn’t get much better or much easier than this. This is a family favorite. Chard is one vegetable that everyone agrees goes well with pasta.

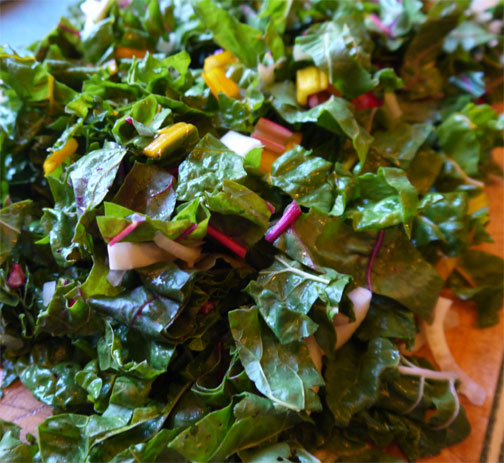
 Swiss chard ready for cooking

2 pounds (12–16 stems with leaves) red, green, or rainbow chard, leaves cut into 1-inch ribbons and stems diced

2 tablespoons extra-virgin olive oil

2 cloves garlic, minced

1 shallot, minced

Pinch of crushed red pepper

Salt and freshly ground black pepper

1 package (30 ounces) frozen cheese-filled ravioli

½ cup freshly grated Parmesan 


1. Bring a large pot of salted water to a boil. Add the chard stems and boil for 2 minutes. Add the leaves and continue to boil until just wilted, about 30 seconds. Remove from the pot with a slotted spoon and drain in a colander.


2. Bring the water back to a boil.


3. Meanwhile, heat the oil in a large skillet over medium-high heat. Add the garlic, shallot, and red pepper and sauté until fragrant, about 1 minute. Add the chard and continue to sauté until heated through, about 3 minutes. Season with salt and pepper. Keep warm.   


4. Add the ravioli to the boiling water and simmer (do not boil) until the ravioli are all cooked through and rise to the surface of the water, about 5 minutes. Drain well.


5. In a large serving bowl or platter, combine the ravioli and chard and toss together. Sprinkle with half the Parmesan and toss again. Sprinkle the remaining Parmesan on top and serve.


Recipe from Serving Up the Harvest by Andrea Chesman.  ©2005, 2007 Andrea Chesman.  All rights reserved. 

Swiss Chard: A Garden Stalwart

Swiss chard is a garden stalwart.  It likes water but takes a good measure of neglect.  It is slow to bolt and reasonably fast to grow. You can harvest only the outer leaves and then enjoy a long season of chard eating, even past the first couple of light frosts.  And with the rainbow chard variety, it is a beauty.  Actually, I think it is beautiful whether the stems be rainbowed, white, or red.
Chard’s botanical name is Beta vulgaris ssp cicla, showing its close relationship with beets (Beta vulgaris).  It’s numerous other names are leaf beet, silverbeet, white beet, spinach beet, strawberry spinach, seakale, Sicilian beet, Chilean beet, and Roman kale.  Since it has been cultivated at least since the hanging gardens of Babylon, it has had time to spread around and acquire regional names.  But by any name, it is a terrific vegetable.
Like any green, Swiss chard will wilt quickly and can be lightly cooked.  But I think chard really comes into its own when baked or braised until the texture is silky and its full flavor has been coaxed out.
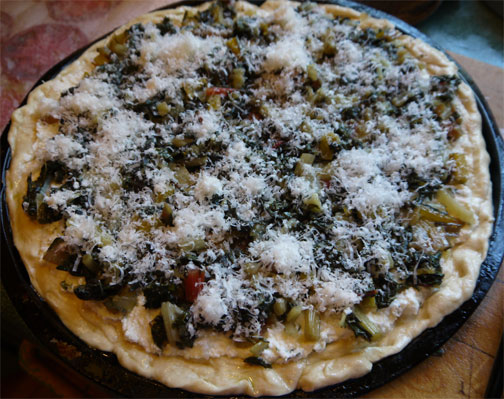
I recently notice that when people flip through my book, Serving up the Harvest, they often comment on a recipe for Braised Chard Pizza.  Since the weather is a little cooler up here in Vermont, I risked turning on the oven recently for this tasty pizza.
Braised Chard Pizza 
Serves 6
Garlic-scented ricotta cheese makes a bed for silken Swiss chard in this lovely green-and-white pizza.
Dough for two 10-inch pizzas
2 pounds (12–16 stems with leaves) ruby, green, or rainbow chard, leaves cut into 1-inch ribbons and stems diced
1/3 cup extra virgin olive oil 
1/4 cup water
1 onion, diced
Salt and freshly ground black pepper
3 garlic cloves, minced
1 tablespoon fresh oregano leaves or 1 teaspoon dried
1 pound ricotta cheese
1 cup freshly grated Parmesan cheese
1. Prepare the pizza dough and set aside in a warm, draft-free place to rise until doubled in bulk, about 1 hour.
2. Meanwhile, braise the chard.  Combine the Swiss chard, oil, water, and onion in a large Dutch oven or large, wide saucepan.  Season with salt and pepper.  Cover and cook over medium heat until the chard is completely tender, 30 to 45 minutes.  Drain well (but reserve the cooking liquid for flavoring stocks or soups or cooking grains).
3. Preheat the oven to 500° F.  
4. Stir the garlic and oregano into the ricotta and season to taste with salt and pepper.  
5. Lightly oil two 10-inch or 12-inch round pizza pan or two 12-inch by 15-inch baking pans. Divide the dough in half.  Stretch each piece of dough to fit a prepared pan. Spread the half the ricotta over each pizza crust. Spoon the chard on top of the ricotta.  Top the pizza with the Parmesan.  
6. Bake the pizzas for 12 to 15 minutes, until the crust is golden and the Parmesan is melted.  
7.  Slice and serve warm. 
Adapted from Serving up the Harvest by Andrea Chesman.  @2005. 2007.  All rights reserved.

Zucchini Season is Here!

At first the summer squash trickle in.  A nice 6-inch zucchini here, a 3-inch pattypan there.  Then all of a sudden, a monster.  Such is the way of the summer squash.

The squash is bigger than my 12-inch chef's knife.
At my CSA pickup this week, we were entitled to six items in the summer squash/cucumber bin.  There were squash of several varieties:  zucchini (of course) in both yellow and gold colors and long and round shapes, a light-skinned Mid-East type, some yellow squash (both straight-neck and crooked), Pattypan (look like flying saucers), and Zephyr (yellow with light green ends).  I went straight for the golden and green straight zucchini, because they are the most versatile, lending themselves to easy slicing, julienning, and cutting into spheres. I skip the round zucchini since they are only good for stuffing, while the straight zucchini can work fine for stuffing and everything else.  Another time I’ll try the Mid-eastern type to see if the flavor varies.  

You’d think with the season just beginning, there wouldn’t be any overgrown summer squash, but, of course, there were a few.  Even at a farm, where the gardening is anything but haphazard and careless, those pesky squash can get out of control easily.  One rainstorm and there you have it: a monster.  It doesn’t help that a healthy plant is big and leafy, fully capable of playing hide and seek, til the squash is overgrown.  The plant just wants to produce seeds. 

Naturally, there was unlimited access to the overgrown squash.  You’d think that after years of growing my own zucchini baseball bats, I’d have had enough.  But no, I happen to have a full repertoire of recipes that deal with overgrown zucchini, and I was hankering to make the Zucchini Cheese Squares that I made for Serving Up the Harvest.

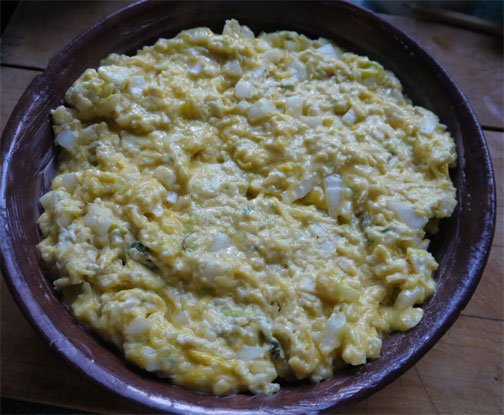
The squash I used was an overgrown Zephyr, so the dish lacked the green flecks that usually dominate the color.  The eggs I used were free-range guinea fowl eggs, so the color is a bit more golden than usual.  Also, for the cheddar, I substituted a mix of Grafton cheddar, Crawford Farm’s Vermont Ayr, and provolone cheese – what I had on hand.

The Zucchini Cheese Squares is ready for the oven.

While happily applying themselves to dinner, my family commented that the title doesn’t do the dish justice.  They got no argument from me—but no one came up with a better name.  The dish could be called a spoonbread, but most spoonbreads are made with cornmeal and the texture is usually softer.  The flour and baking powder rule it out of the frittata category.  The eggs aren’t separated, so it isn’t a soufflé.  We pondered the problem until it disappeared.  

Literally.  Not a crumb was left.  Let me know if you come up with a better name.

Dinner was Zucchini Cheese Squares, green salad dressed with Ripton House Dressing (see below), plus pickled golden beets, and cantaloupe. If the beets had been purple, the colors of dinner would have been perfect.

Zucchini Cheese Squares

Serves 6 to 8 

Zucchini Cheese Squares

My kids love these “zucchini pillows.”  The texture is softer than a bread and denser than a soufflé, with just the trace of crunch from the onions.  It makes a great side dish, especially on a picnic, where the squares can be eaten out of hand.  You can use overgrown zucchini here.
3 cups grated zucchini

2 teaspoons salt

2 cups grated cheddar cheese

1 onion, diced

1 1/2 cups all-purpose flour 

1 tablespoon baking powder

2 teaspoons fresh thyme leaves or 1/2 teaspoon dried

1 teaspoon freshly ground black pepper or lemon pepper

1/2 cup canola oil

3 large eggs, beaten

1.  Combine the zucchini and salt in a colander and toss to mix.  Set aside to drain for 30 minutes.  Squeeze out the excess water. 

2.  Preheat the oven to 350° F.  Butter a 7- by 11-inch or 9-inch round baking dish.

3.  In a medium bowl, stir together the flour and baking powder.  Add the zucchini, cheese, thyme, and pepper.  Mix well with a fork, breaking up any clumps of zucchini.  In a small bowl, whisk together the oil and eggs.  Pour into the zucchini mixture and mix well.  Spread evenly in the baking dish.

4.  Bake for about 35 minutes, until golden.

5.  Let cool on a wire rack for 5 minutes.  Cut into squares and serve warm or at room temperature.

Adapted from Serving Up the Harvest.  © 2007, 2009 Andrea Chesman.

Volunteers in the Garden

Easy Pumpkin CakeI’m not talking about getting the kids or the neighbors or friends to help with big chores, like digging new beds or erecting fences.  I’m talking about volunteers, spontaneous growth of unplanned and unplanted vegetables.


Some people call them weeds.


You don’t have to be particularly inexperienced or particularly soft-hearted to think that volunteers are a good thing.  I rarely have to plant dill or cilantro because it just pops up near wherever it grew the previous year.  Tomatoes often volunteer and because I plant heirlooms, they breed true.  Last year we had a generous harvest from a single volunteer tomatillo plant (which was something of a mystery because I’ve never grown tomatillos).


So last year when a volunteer winter squash popped up in a corner of the garden, we—my son and I—allowed it to spread across the lawn.  We couldn’t guess the variety until it had fruited, so against my better judgment, we let it grow.  I knew it was likely to be some ancient winter squash throwback, some variety whose genes were mixed into a hybrid variety for a single characteristic like color, or days to harvest, but not necessarily fine flavor. It certainly grew vigorously and fruited copiously.  


The harvested squash turned out to have no verifiable identity. It looked like a green pumpkin, with paler flesh.  “Can I compost it now?”   I asked throughout October and early November.  “No, no, don’t throw it out!  Cook it.”  Who throws away good food?  Not me.

Spaghetti squash and no-name squash/pumpkin harvest

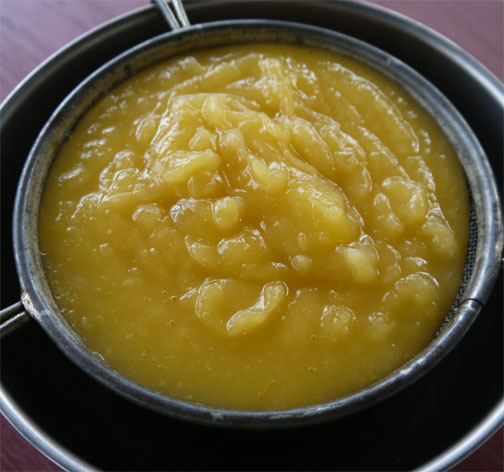
I cooked the odd squash and found the flavor insipid but not bad.  The flesh was watery, perhaps by nature but perhaps because it had been such a wet growing season. Whatever it was, I put by several quarts in the freeze because I’m not the type to waste food.  I figured even weird, watery, no-name squash would be fine in this foolproof recipe for pumpkin cake


Now it is time to use up the old harvest to make way for the new.  And I still have several containers of this squash. 


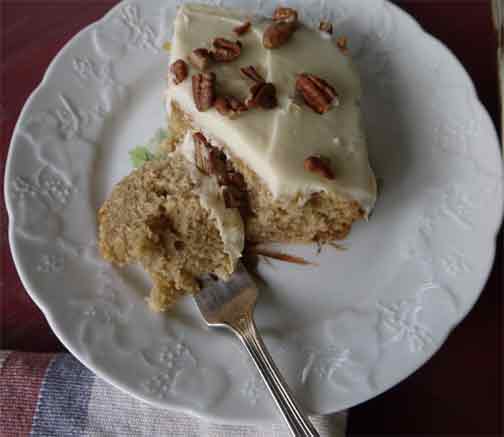
This quick and easy recipe is perfect for using up pureed winter squash or pumpkin—frozen or canned, insipid or inspiring. I topped it with chopped pecans and sent it off to the refreshment table for the May Ripton Community Coffeehouse concert with Dollar General.  It was eaten and I heard no complaints—sugar fixes what nature doesn’t. 

Easy Pumpkin Cake

Serves 12 to 15

At my children’s elementary school, this recipe was passed from mother to mother and from class to class.  It was featured at the school’s annual Thanksgiving feast, a meal prepared by parents and school children and shared with all the school families and the town elders each year.  It has become the cake I am most likely to whip up when a bake sale or potluck dinner catches me unprepared.  And it is absolutely foolproof.


First I drained the squash puree so it would be less watery.

2 cups unbleached all-purpose flour

2 teaspoons baking powder

2 teaspoons ground cinnamon

1 teaspoon baking soda

1 teaspoon salt

1 1/2 cups sugar

1 cup canola oil

4 large eggs

1 3/4 cups cooked and mashed pumpkin or winter squash puree 

Cream Cheese Frosting

1 (8-ounce) package cream cheese, softened

1/2 cup butter, softened

1 teaspoon vanilla extract

2 to 2 1/2 cups confectioners’ sugar, sifted

1. Preheat the oven to 350° F.  Butter and flour a 9- by 13-inch baking pan.

2. In a medium-sized mixing bowl, combine the flour, baking powder, cinnamon baking soda, and salt.  Mix well.
 

3. In a large mixing bowl, combine the sugar and oil and beat until light.  Add the eggs, one at a time, beating well after each addition.  Beat in the pumpkin.  Add the flour mixture and beat just until thoroughly blended.  Pour the batter into the prepared pan.

4. Bake for 30 to 35 minutes, until the top springs back when lightly touched.

5. Cool completely on a rack.


6.  To make the frosting, beat together the cream cheese, butter, and vanilla.  Add 2 cups confectioners’ sugar and beat until smooth.  If the frosting is too thin, add the additional 1/2 cup confectioners’ sugar and beat until smooth.

7. Spread evenly over the cooled cake.


From Serving up the Harvest by Andrea Chesman.  © 2009 Andrea Chesman.  All Rights Reserved.


Bird and Biscuits

A cookbook writer never rests.  Maybe a recipe seems perfect as it goes into print, but inevitably, an improvement occurs.  Such is the case with my chicken potpie, one of the family favorites for years. The biscuit lovers requested that I bake the biscuits separately from the creamed chicken and vegetables. The biscuits absorbed too much moisture was the complaint.  Not much of a change as it turned out, but oh, what a difference!  
The biscuits remain tender, and the creamed chicken seems richer.  This is comfort food, there’s not doubt about it. The chicken (or turkey) can be leftovers from a roasted bird or from making stock or it can be quickly prepared by poaching split chicken breasts for 35 minutes.  I change the vegetables with the seasons. It’s winter now, so I used golden beets, carrots, rutabagas, and turnips.
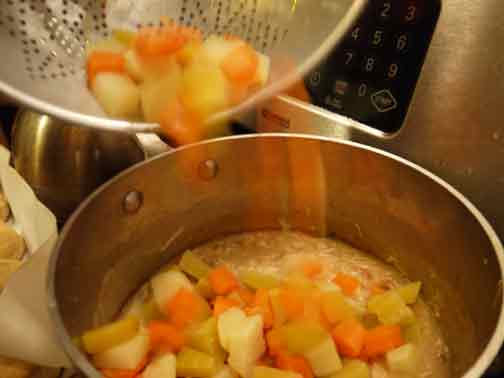
Adding the vegetables

 I could have also used celery root, parsnips, salsify, and/or winter squash. Good choices for the summer are corn (removed from the cob), carrots, green beans, or zucchini.  Frozen peas are always good.                                                                                                                                                                                                                                                                                                                                                                                                                                                                                                                                 
Chicken and Biscuits                                                                                                                                                       
Rolled Biscuits (see below)
6 tablespoons butter, chicken fat, or any vegetable oil 
2 shallots, minced, or 2 leeks, thinly sliced
2 garlic cloves, minced (optional)
6 tablespoons all-purpose unbleached flour
4 cups chicken stock 
4 cups cooked chicken
4 cups cubed vegetables, peeled if necessary
1 tablespoon chopped fresh dill or 1 teaspoon dried thyme
2 tablespoons sherry or dry white wine (optional) 
Salt and freshly ground black pepper                                                                                                                                                                                     
1.  Prepare the biscuits according to the directions below, up through step 3.  Place in the refrigerator.                                              
2.  If you are using fresh root vegetables, put in a saucepan, cover with water, and add about 2 teaspoons salt.  Bring to a boil and boil until just tender, about 10 minutes.  Drain.  If you are using, fresh summer vegetables, steam over boiling water until tender, about 5 minutes.  If you are using frozen vegetables, remove from the freezer.                                                                                                           
3.  Preheat the oven to 450°F.                                                                                                                                        
4.  To make the creamed chicken, heat the oil in a large saucepan over medium heat.  Add the shallots and garlic, if using, and sauté until fragrant and limp, 3 to 5 minutes.  Sprinkle in the flour and stir until all the flour is absorbed into the oil.  Whisk in the stock and stir until thickened and smooth.  Stir in the chicken, vegetables, dill, and sherry, if using.  Taste and adjust seasoning with salt and pepper.  Bring to a simmer.  Keep hot while you bake the biscuits.                                                                                                                               
5.  Remove the biscuits from the refrigerator.  Bake for 15 to 18 minutes, until the biscuits are golden.                
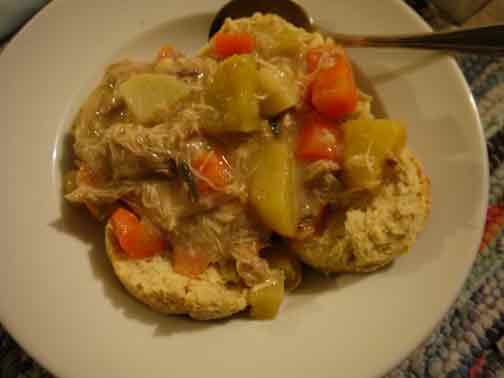
6.  To serve, split open one or two biscuits for each serving.  Ladle the chicken and vegetable mixture over the biscuits halves and serve immediately.                                                                                                                                                                                                                                                                                                                                                                                                                                                                           
Biscuits                                                                                                                                

 
Biscuits 
With a food processor, biscuits are really easy to make – no rolling required.                                                                                                                                                                                                                                 
3 cups unbleached all-purpose flour
2 tablespoons baking powder
1 1/2 teaspoons salt
2/3 cup butter, cut into pieces
1 cup buttermilk                                                                                                                                                            
1. Preheat the oven to 450°F with an oven rack in the middle of the oven.  For ease of clean-up, line a sheet pan with parchment paper or a silicone baking mat.                                                                                          
2. Combine the flour, baking powder, and salt in a food processor.  Add the butter and process until the mixture resembles coarse crumbs.  Pour in the buttermilk and process to make a soft dough.                                                       
3.  Transfer the dough to a lightly floured board and knead a few times to make a smooth ball.  Pat out the dough to a thickness of about 1/2 inch.  Cut into 3-inch rounds.  By gathering the scraps and patting out again, you should get twelve biscuits.                                                                                                               
4. Bake for 15 to 18 minutes, until golden brown.                                                                                                   
5.  Serve as soon after baking as possible.  Biscuits are best on the day they are made.  Day-old biscuits (if they last that long!) are delicious toasted.                                                                                                                  
Adapted from Serving Up the Harvest by Andrea Chesman © 2008.  All rights reserved.


Can't Cook Enough Kale!

Can’t Cook Enough Kale!

That was the title of a workshop I recently gave at the Mother Earth News fair in Seven Springs.  I am still catching off from my time there, when I promised to post recipes I prepared at the demo.  At last, I am fulfilling that promise. Below is the stir-fried greens I prepared for that demo.  I am also posting recipes for a salad and for shredded sautéed winter vegetables – two recipes I prepared for a workshop on Cooking Winter Vegetables.

 Kale is still growing.

      I am behind in every aspect of my life – in part because I have been busy trying to put my garden to bed.  Not a minute too soon, because the snow came this weekend.  Putting the vegetable garden to bed was a fairly easy task, because the soil is so lovely and yielding.  I planted a nice big bed of garlic and mulched the salsify, which I won’t harvest until the spring.


  Garden writers can wax poetic about time and worries slipping away in the Zen of gardening.  Not me, I was caught up in a sweaty profane battle against bishop’s weed in my perennial bed.  Bishop’s weed spreads by underground runners, and I suspect in a battle for territory against mint, the bishop’s weed would prevail.  It arrived unannounced and unwanted, probably in a perennial I purchased or was give by a “friend.”  Trying to get rid of it required digging up every square inch of garden and then sifting through the soil to remove even the smallest piece of root that remained.  I have no illusions that I succeeded in eradicating that pest, but I do think I made serious headway.  And along the way, I separated the iris and daylilies, which were in need of attention.

      Quite honestly, I’d rather be cooking.


Sichuan-Style Stir-Fried Chinese Greens

This has a few exotic ingredients, because I wanted to keep this vegetarian and I wanted to make something you might not have already tasted.  The odd ingredients are: Sichuan peppercorns and Chinese black vinegar.  Sichuan peppercorns are actually the berry of the prickly-ash and can be found at Asian groceries, perhaps under the name anise pepper, Chinese pepper, fagara, flower pepper, or sansho.  Chinese black vinegar has a distinctive flavor, closer to balsamic vinegar than to regular rice vinegar.  To make a reasonable substitute for Chinese black vinegar, mix 1 part soy sauce, 1 part Worcestershire sauce, and 1 part rice vinegar.


4 small dried chiles

2 teaspoons Sichuan peppercorns

2 garlic cloves, minced

1 1/2 pounds napa cabbage, bok choy, Chinese broccoli, kale, or other Chinese greens or a mix of greens, trimmed and sliced 1 inch thick, tough stems discarded

1/2 teaspoon sugar

1 tablespoon Asian sesame oil

Salt

Chinese black vinegar

      1.  Chop 1 ½ pounds kale or other greens

      1.  Heat 2 tablespoons in a large wok over high heat.  Add the 4 small chiles, 2 teaspoons Sichuan peppercorns, and 2 minced garlic and sauté for 30 seconds, just until fragrant.  Add the greens and stir-fry for 3 minutes, until the greens are wilted.  Cover and let steam until tender, 1 to 3 minutes, depending on the green and your preferences.

      2.  Add the ½ teaspoon sugar, 1 tablespoon sesame oil, and salt to taste.  Toss to mix.  Drizzle with the vinegar and serve immediately.


From Recipes from the Root Cellar by Andrea Chesman. ©2010.  All rights reserved.


Thai Sweet-Spicy Cabbage Salad

Serves 6 to 8

      This cabbage salad uses regular green cabbage, but napa cabbage could be substituted.  The secret ingredient is Thai sweet chili sauce, a condiment found in Asian markets.  It is made of sugar, vinegar, and chiles and makes a wonderful dressing for salads or a dip for spring rolls.  This salad combined with chicken makes a delicious wrap.


1 small head (about 1 1/2 pounds) green cabbage, cored and very finely sliced

2 teaspoons salt

1 carrot, grated

1/2 cup Thai sweet chili sauce

1/2 cup chopped roasted salted peanuts


      1.  Combine the cabbage and salt in a colander and toss to mix.  Let stand for about an hour to wilt the cabbage.

      2.  Taste the cabbage.  If it is too salty, rinse with cold running water.  Then drain.  Combine the cabbage, carrot, and chili sauce in a large bowl and toss to mix.  Add the peanuts and toss to mix.

      3.  Let stand for 30 minutes to allow the flavors to blend before serving. 


From Recipes from the Root Cellar by Andrea Chesman. ©2010.  All rights reserved.


Sautéed Shredded Root Vegetables

Serves 4 to 6

      This sauté of vegetables takes 10 minutes to cook and looks as beautiful on the plate as it is delicious to eat.  Vary the seasonings if you like, the shredded vegetables are amenable to experimentation.


3 tablespoons sunflower or canola oil

4 cups peeled and shredded mixed root vegetables (beets, carrots, celery root, parsnips, rutabagas, salsify, and /or turnips)

1 leek, trimmed and thinly sliced

4 garlic cloves, minced

½-inch piece fresh ginger, peeled and minced

1/4 cup dry white wine

Salt and freshly ground black pepper

Freshly grated nutmeg


      1.  Heat the oil in a large skillet over medium heat.  Add the root vegetables, leek, and garlic and sauté until the vegetables are limp, about 5 minutes.  Add the wine, cover, and cook until the vegetables are tender, about 5 more minutes.    

      2.  Season to taste with salt, pepper, and nutmeg.  Serve hot. 


From Recipes from the Root Cellar by Andrea Chesman. ©2010.  All rights reserved.


Mastering the Art of the Stir-Fry

I am playing catch up with my work since the MEN fair.  I promised I would post recipes from my workshop.  I’ll begin with the stir-fry I demonstrated in the workshop, “Mastering the Art of Stir-Frying.  It is a basic recipe that can be adapted to ingredients at hand.  In the demo I used tofu as the protein and vegetable broth in the sauce.  The firm vegetables were a combination of broccoli, carrots, and green beans and the oyster sauce was a vegetarian version sold as “stir-fry sauce.”


Basic Stir-Fry

Serves 4

            If I had my druthers, I’d probably make stir-fries on most nights.  It is important to have all the vegetables prepped and all the ingredients assembled before you start cooking.  And don’t forget to start cooking the rice first.  I have an electric rice cooker, purchased years ago.  It is an appliance that gets regular use and more than justified its inexpensive purchase price.


1 pound boneless skinless chicken, beef, or pork, sliced into matchsticks, or 1 pound extra-firm tofu, pressed and cubed (see Note)

5 tablespoons soy sauce

3 tablespoons oyster-flavored sauce or vegetarian stir-fry sauce

2 tablespoons rice wine or dry sherry

1 tablespoon sugar

2 teaspoons sesame oil

1/4 teaspoon black pepper

1 onion, halved and cut into slivers, or 1 leek, white and tender green parts only, thinly sliced

4 cups chopped or diced firm vegetables (asparagus, broccoli, carrots, baby corn, snap beans, snow peas or snap peas), corn kernels, or shelled peas

8 cups slivered greens (cabbage, bok choy, broccoli raab, chard, escarole, kale)

1/2 cup chicken or vegetable broth (see pages 000 to 000)

1 tablespoon cornstarch

3 tablespoons peanut or canola oil

1-inch piece fresh ginger, peeled and minced

3 to 4 garlic cloves, minced

Hot cooked white rice


            1.  In a medium bowl, combine the meat or tofu, 2 tablespoons of the soy sauce, oyster sauce, 1 tablespoon of the wine, sugar, sesame oil, and pepper and set aside to marinate.

            2.  To make the sauce, combine the broth, 1 tablespoon soy sauce, remaining 1 tablespoon wine, and cornstarch.   Whisk until thoroughly combined.

            3.  Heat a large wok or skillet over high heat.  Add 1 tablespoon the oil and heat until very hot.  Add the meat or tofu and marinade and stir-fry, stirring constantly, until well browned, 4 to 6 minutes. With a heat-proof rubber spatula, scrape out all the meat or tofu and sauce into a medium bowl and keep warm.  Return the wok to high heat. 

4.  Heat 1 tablespoon oil over high heat until very hot.  Add the onion and firm vegetables and stir-fry until slightly softened, about 3 minutes.  Add 1 tablespoon soy sauce, cover, and let the vegetables steam until soft, 3 to 4 minutes.  Remove from the wok and add to the meat or tofu.

5.  Return the wok to high heat and add the remaining 1 tablespoon oil.  Add the leafy green vegetables and stir-fry for 1 minute.  Add the remaining 1 tablespoon soy sauce and continue to stir-fry until limp, about 2 minutes more.  Push the vegetables to the sides of the pan and add the ginger and garlic.  Cook until fragrant, about 45 seconds.  Stir into the vegetables.

6.  Return the meat or tofu and vegetables to the wok and toss to combine.  Whisk the sauce and pour into the wok.  Stir-fry until the sauce is thickened and evenly coats the vegetables, 1 to 2 minutes. 

7.  Serve immediately with the hot rice.


Recipe from Serving Up the Harvest by Andrea Chesman©2005, 2007.  All rights reserved.

Summer Means Squash

A few years ago I received a phone call asking me if I was interested in taking on a revision of Garden Way’s classic Zucchini Cookbook, in honor of the twenty-fifth anniversary of its original publication.  As a freelance writer who was in between projects, I was happy to say yes. 

Contracts were signed, zucchini was planted, meetings arranged.  At one of those meetings, I happened to mention to the sales manager at Storey Publishing that I thought zucchini was basically a very bland vegetable, and his jaw dropped.  But that’s a good thing, I hastened to add.  Because it means that you can do a lot with it.

That an overabundance of zucchini can be a problem is uncontestable.  Every article I have ever read about zucchini mentions a New England suburban myth: Why do Vermonters (or New Yorkers, or Mainers, or whatever – you supply whatever applies to you) have to lock their car doors every August?  To keep people from filling their cars with zucchini, of course! 

It happened to me.  One September, my husband and I threw a birthday bash in the Ripton Community House for 100 of our closest friends and while my back was turned, the deed was done.

I don’t know when I’ve had more fun in the kitchen.  

Making up recipes for zucchini is almost like child’s play.  You can do anything with zucchini, and get good results.

My breakthrough moment in the kitchen occurred about a week after attending a zucchini festival.  I heard rumors of “mock apple pies” made with zucchini instead of apples. I followed the directions I was given and was amazed at its resemblance to apple pie.  If you peel zucchini and cook it in lemon juice with enough sugar and spice, you get something very much like apple pie filling.  I took the pie on a picnic and completely enjoyed the incredulous looks I received when I told my friends the pie was made with zucchini, not apples.  I had fooled almost everyone.

My son looked up from his slice and told me I should call it “Zapple Pie.”   After the Zapple Pie, we started thinking up recipe titles.  Zapple Pie was swiftly followed by Zesto Pesto Pizza (pesto plus zucchini) and Zingerbread (gingerbread plus zucchini).  This was fun, and the recipe-testing results were delicious.  We moved on to Zesto Pasta Salad and Zapple Strudel – not to mention Squococonut Pie – coconut custard pie made  with yellow squash and coconut flavoring, but no coconut.

Even without cooks disguising squash as apples, this vegetable has a history of causing confusion.  While Europeans were cultivating various types of gourds, New World natives were enjoying squash and pumpkins for at least 7000 years.  The confusion arose when the first European explorers visited the Americas and reported that the natives were cultivating a new type of melon.  It was a mistake made again and again, because the Europeans had never seen anything like squash, and so they had no word for it.   Nonetheless, squash was readily adopted by the first European settlers, who couldn’t be too choosy, given their circumstances.

Squash, when young and unripe, is summer squash.  When ripe and hard-shelled, it becomes winter squash. According to botanists, there is no firm line winter squash from summer squash,  or winter squash from pumpkins, for that matter.  Basically there are four types of edible squashes.  Cucurbita pepo is noted for its pentagonal stems with prickly spines.  This group includes zucchini and all the summer squashes, as well as pumpkins, acorn squash, spaghetti squash, and numerous gourds.  Butternut squash, which is one of the best replacements for pumpkin in any recipe, is in another grouping entirely (C. moshata, which has pentagonal stems without spines).  C. maxima  (round stems) includes buttercup, Hubbard, and turban squashes.

Winter squash and pumpkin rapidly became staples in New World kitchens, but summer squash were not common until the 1950s, when the zucchini was re-introduced from Italy.  It came via a circuitous route.  Sometime in the 1820s, a South American squash called the Valparaiso was introduced to Europe.  As it was adopted, the long, thick, meaty squash became known as the vegetable marrow of England and the cocozelle of France and Italy.  Increasing travel in the post-war era meant that Americans slowly broadened their palates and refrigerated rail cars and other technological improvements allowed a wider range of foods to become available.  Home gardeners were the first to pick up the zucchini, and it was accepted quite rapidly.  Today zucchini and other summer squash are supermarket staples.

Most summer squash recipes are interchangeable.  All of the summer squash  have tender, edible skins and flesh that ranges mild and nutty to buttery or cucumber-like.  But the shapes and appearance vary considerably.  With more and more varieties available from garden seed catalogs, farm stands, and supermarkets, it is fun to experiment with new types. 

Unless you are preparing squash to masquerade as apple, don’t peel the squash as this is where most of the nutrition, fiber, and flavor lie.

 My standard summer vegetable dish starts with extra virgin olive oil in a skillet.  Next I throw in chopped garlic and chopped vegetables, which usually means summer squash.  Maybe I’ll throw in a handful of green beans, some corn stripped off the cob, chopped Swiss chard, or diced bell pepper.  I sauté the veggies until tender, about 5 minutes.  Finally, I’ll add some chopped tomato and/or basil and season generously with salt and pepper.  It’s never quite the same dish, and we never tire of it.  

Here’s two recipes to get the summer squash out of your garden and onto the table.

Ratatouille

Serves 6 to 8

            In the perfect ratatouille, the flavors are blended, yet each vegetable remains distinct.  The vegetables are neither mushy nor undercooked.  To do this properly, sauté each vegetable separately in a large skillet and then combine them in a saucepan just long enough to blend the flavors. Chopped fresh basil, or a little thyme or oregano makes fine additions.


7 tablespoons extra virgin olive oil

1 medium-sized eggplant, peeled and diced

Salt and freshly ground black pepper

1 onion, diced

1 small green bell pepper, diced

1 small red bell pepper, diced

2 small zucchini, diced

2 small yellow summer squash, diced

2 ripe tomatoes, seeded and diced

4 garlic cloves, minced

1 (8-ounce) can unseasoned tomato sauce or tomato puree


            1. In a large skillet over medium-high heat, heat 3 tablespoons of the oil.  Add the eggplant and season with salt and pepper.  Sauté until browned, juicy, and cooked through, 10 to 12 minutes.  Transfer to a medium saucepan with a slotted spoon.

            2. Return the skillet to medium-high heat and add 2 more tablespoons of the oil. Add the onion and bell peppers and sauté until tender-crisp, 3 to 5 minutes.   Transfer to the saucepan with a slotted spoon.

            3. Return the skillet to medium-high heat and add the remaining 2 tablespoons oil.  Add the zucchini and summer squash and season with salt and pepper.  Sauté until tender-crisp, 3 to 5 minutes. Transfer to the saucepan and add the tomatoes, garlic, and tomato sauce. 

            4. Simmer the ratatouille for 15 minutes over medium heat. 

5.  Taste and adjust the seasoning.  You can serve immediately, but the flavor will improve if the ratatouille sits at room temperature for 1 to 2 hours.  Serve at room temperature, or reheat and serve warm.

From Serving Up the Harvest. © Andrea Chesman, 2006.  All rights reserved.


Zapple Pie with a Streusel Topping

            In the tradition that began with a recipe on the back of a box of Ritz crackers comes this ultimate mock apple pie, made from zucchini.  I love to serve this pie to the unwitting and watch their response when I tell them it was made from zucchini.  This is a delicious pie – and you can’t help smiling as you eat it.


6 cups peeled, quartered, and thinly sliced zucchini (about 2 pounds)

3/4 cup sugar

2 teaspoons ground cinnamon

1/4 teaspoon ground nutmeg

1/2 cup plus 2 tablespoons fresh lemon juice

1/3 cup unbleached all-purpose flour

1 unbaked 9- or 10-inch pie shell


Topping

1/2 cup unbleached all-purpose flour

1/2 cup packed light brown sugar

1/4 cup butter

1 teaspoon ground cinnamon

1 cup chopped pecans or walnuts


            1.  To make the filling, combine the zucchini, sugar, cinnamon, and nutmeg in a medium saucepan over medium heat.  Add the 2 tablespoons lemon juice.  Stir to mix and cook until tender but not mushy, about 15 minutes, stirring frequently. 

2.  Dissolve the flour in the remaining 1/2 cup lemon juice.  Stir into the zucchini.  Continue to cook until the mixture thickens, 2 to 3 minutes.    Remove from the heat.

3. Preheat the oven to 450° F. 

4.  Make the topping.  Combine the flour, brown sugar, cinnamon, and butter in a small bowl.  Cut in the butter until the mixture is crumbly.  Stir in the pecans. 

            5.  Spoon the filling into the pie shell.  Top with half of the streusel topping.  Place in the oven and reduce the oven temperature to 350° F.  Bake for 30 minutes, until the crust is browned and the filling is bubbling.

6.  Sprinkle the remaining topping over the pie.  Turn on the broiler.  Run the pie under the broiler for about 3 minutes, until the topping is browned.

7.  Set the pie on a wire rack to cool.  Serve warm or completely cooled.  This is best served on the day it is made.


From The Classic Zucchini Cookbook © 2002, 1990. 1977 by Storey Publishing.  All rights reserved.