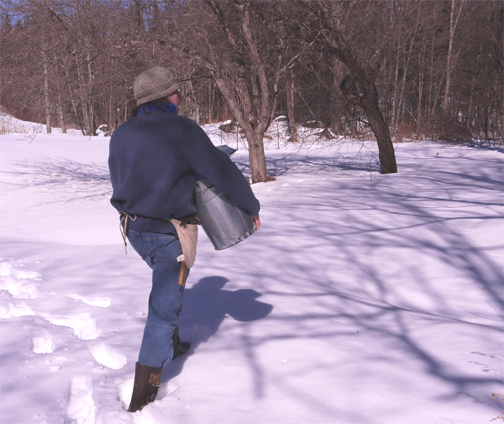
 Hauling buckets in 2 feet of snow
Today I committed myself to spring. That is, today my husband and I tapped four maple trees, installing just seven taps. We aren’t looking for a cash crop of maple syrup—or even a barter crop—just enough syrup to sweeten our days and make gifts for family. Those seven taps—three of which are already running—will yield us gallons of maple sap that I will boil down into syrup on my kitchen stove as I go about my ordinary days doing my ordinary things.
Surely winter has had us in its grip long enough. The path to the buckets is two feet of corn snow that falls into our boots in icy clumps. Friday, when we woke, it was -8°F (“you get up too early,” laughed my sister on the phone), but by one o’clock, it was a warm bright day. The sunlight means something. I can feel my bones defrosting.
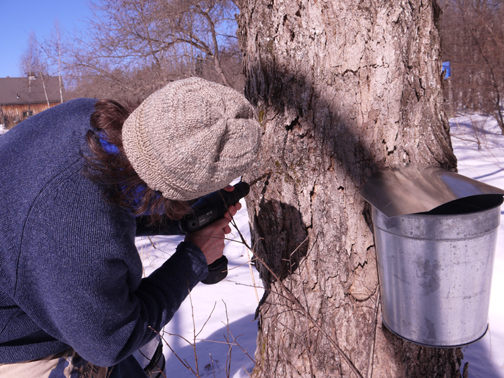 We drill holes with a portable drill.
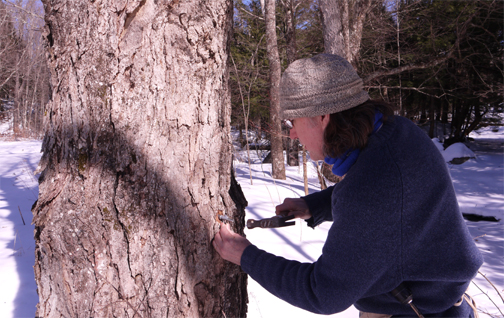 Then hammer in the taps
I haven’t bought any maple syrup in about 15 years. Most of our sugaring equipment was bought used; some of our taps are real antiques. We make our tap holes with a portable drill, then we hammer in the taps, hang the buckets, and slip the lids on the buckets. It takes maybe a minute per bucket. The well-known statistic is that it takes 40 gallons of maple sap to make 1 gallon of syrup. In fact, the ratio is anywhere from 20 to 1 to 40 to 1. Some years all the trees yield sweeter sap than other years, and there is always variation from tree to tree. If you drink sap, which many people do, you can often taste the variation in sweetness.
People look at me with amusement when I say that we have been boiling maple sap into syrup in the kitchen for all these years and have only ran into a problem once—an ice dam that formed on the roof outside the kitchen because of extra moisture that collected during very cold weather. We weathered it. Oh, and the surface of my stove around the burner has become pitted and has lost its finish—a cosmetic issue caused by long periods of high heat. I’ve heard tales of wallpaper falling off walls, mold forming on painted surfaces, and the like, but I’ve never experienced it or visited anyone with firsthand experiences of said disasters.
All maple syrup doesn’t taste the same! Definitely how well you handle the process, your sanitation and cleanliness will affect the final results. But there is more to it than that. Early in the season, the sap will yield a light-colored syrup, called Fancy or Grade A. As the season progresses, the sap yields a darker syrup, or Grade B. At the end of the season, as leaf buds begin to form, the sap will yield a dark, dark syrup and it will begin to taste “buddy” or off. That is when it is time to stop. In between the extremes of fancy and buddy, the syrup will have hints of vanilla, crème brûlée, coffee beans, dark chocolate, butter, and even a subtle hint of smokiness. In general, I prefer dark syrup for baking and lighter syrup for pancakes, but that is a personal preference.
When sap is flowing, I collect the sap daily. If I can’t boil the sap immediately, or if I collect more than will fit in my 5-gallon stock pot, I try to keep the sap as cold as I can, preferably outside, in the shade, and packed with snow.
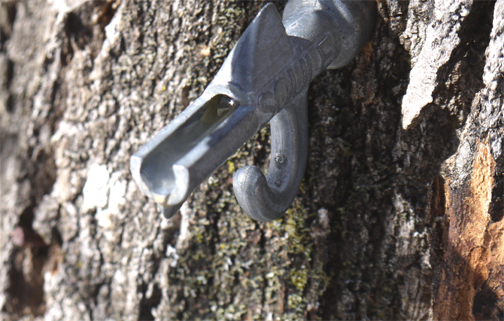 Sap dripped from our antique tap as soon as we hammered it it.
Making maple syrup is really easy. You filter the sap before pouring it into your boiling container to filter out insects and twigs that flew or blew into the collecting buckets. (I use coffee filters or cheesecloth fit in a strainer.) Then you boil until it is syrup. It is that simple. And yes, you can interrupt the process at any point (like you want to go to bed, finally!), but keep whatever you took off the stove chilled.
Really, the most challenging part of the process is figuring out when the syrup is done. Syrup that is too thin may ferment in storage—or change the baking time or texture of your baked goods that use syrup. If the syrup is too dense, it may form sugar crystals during storage. You can judge when the syrup is ready by visual cues (risky but cheap), by using a thermometer (you should have one anyway for judging when meat is done), or by using a hydrometer (single use, but highly accurate and can be found for under $20).
If you are going to use a thermometer correctly, you need to figure out the boiling temperature of water on that day. Boiling temperature is generally 212°F. But it will go up or down based on your elevation and on the atmospheric pressure on that day. If you are going to use visual cues, stick a plate in the freezer. A spoonful of syrup dropped on the chilled plate will allow you to leave a trail if you run a finger through it.
Your syrup will contain a small amount of sediment, known as nitre or sugar sand. You can filter the hot syrup through a wool filter or you can bottle the syrup without filtering. The nitre will settle to the bottom of the jar. When you use the syrup, just don’t use the every last drop; discard the sediment at the bottom of the jar. Alternatively, you can let the nitre settle, pour off the syrup, again leaving the sediment behind, and reheat to 180°F and bottle it hot. Don’t let the syrup get hotter than 180°F or more sediment will precipitate out.
That’s it. Making maple syrup is the best way I know to wait for the ground to thaw.
