The Pickled Pantry

The Year of the Ferment

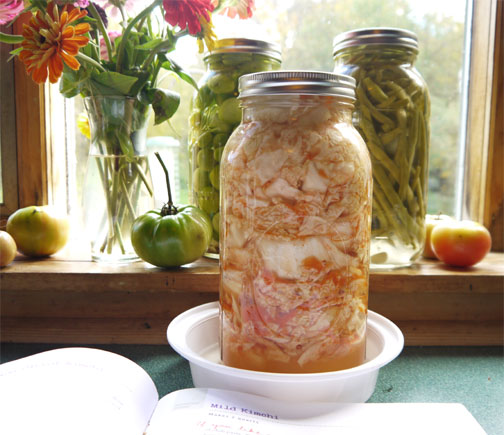
Dilled Green Tomatoes, Dilly beans, Mild Kimchi all from The Pickled Pantry.The year 2013 may be the year fermentation reached critical mass in America.  I’m off to a fermentation festival in Boston next weekend (http://eglestonfarmersmarket.org/fermentation-fest), and there have been other fermentation festivals throughout the summer – almost as many fermentation festivals as music festivals.  Fermented pickles are found at almost every farmer’s market and farm-to-table restaurant menus. 


The mainstream health community is catching on to the idea that the billions of microbes we host in our bodies, especially in our guts, are kept healthy and well when we eat plenty of fermented foods with live cultures.  Of course, fermented foods with live cultures includes some beers and wine, some sodas, kombucha, yogurt, and miso, tempeh, and more.


So as summer winds down, I am fermenting green tomatoes and dilly beans as a way of dealing with the harvest.  We took in about 40 pounds of tomatoes, much of it green when frost threatened.  The beans were ready for harvest even if the tomatoes weren’t.  Still 10 pounds of snap beans on top of the 10 pounds harvest the week before and the week before means lots of beans to deal with. 


The kimchi is less about dealing with the harvest and more about my household’s love of kimchi.  It is great tasting stuff – and very “morish” – the more you eat, the more you want.


All of my ferments are made in canning jars.  I use a beer bottle sanitizer to clean the jars and all my utensils.  Scrupulous attention to cleanliness pays off.  My small batches mean that if a jar goes off (which doesn’t seem to happen since I switched to jars), my investment in ingredients and time is minimal.  My ferments do age, getting softer and more sourer, but I am more likely to finish a small batch before it gets unpleasant than I am a large batch. 
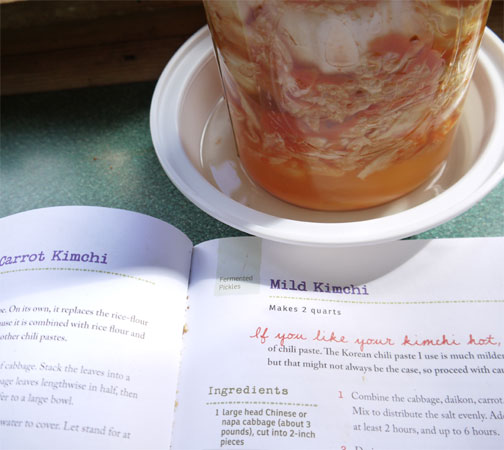
About 1/2 inch of brine as been forced out as the kimchi ferments 

I fill the jars to the very brim with brine, then cover them with the canning jar lids and screwband.  I close the screwband fingertip tight – not ninja, tough-guy tight.  Then I put the jars in containers or on saucers.  Ferments that make their own brine (kimchi, sauerkraut) will push some of the brine out as they actively ferment. But no air comes in.  After the jar is opened and sampled, I continue to make sure the remaining pickles stay under the brine level. mixing up some additional brine to keep everything covered as needed.   Once I put the jar in the refrigerator, I don’t worry about the brine levels.
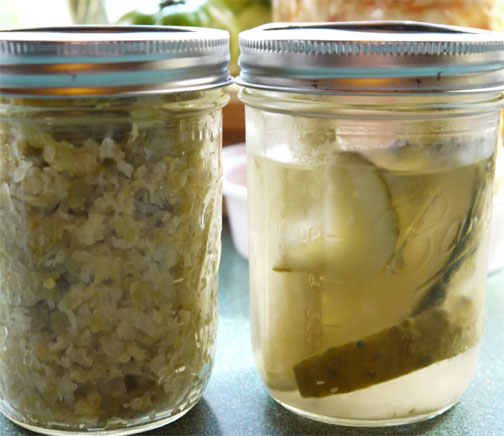
The saurkraut and dilly beans started out in 2-quart jars and are now in pint jars. Moving the ferments to smaller jars reduces exposure to air and extends the life of the pickles. 

This is the recipe for the kimchi I usually bring to workshops for tasting.  I have been promising to post it for a while.
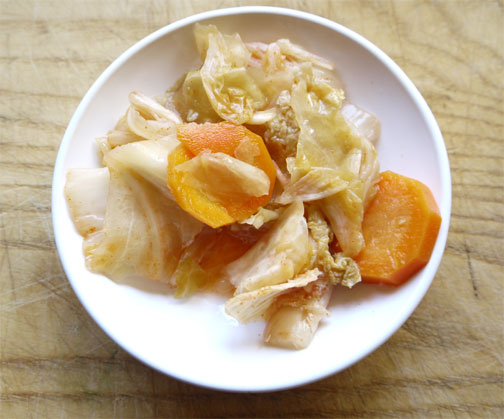
 Kimchi is "morish." The more you eat, the more you want.

Mild Kimchi

Makes 1 quart

            If you like your kimchi hot, increase the amount of chili paste. 


8 cups Napa cabbage, cut into 2-inch pieces

4-inch length daikon radish, peeled and thinly sliced

1 carrot, sliced

½ cup pickling salt

Water to cover

2 garlic cloves, minced

1 tablespoon Korean chili paste

½ teaspoon minced fresh ginger root

½ teaspoon sugar


            1.  Combine the cabbage, daikon, carrot, and pickling salt in a large bowl.  Mix to evenly distribute the salt.  Add water to cover.  Let stand for at least 2 hours, up to 6 hours.

            2. Drain, reserving the brine.  Add the garlic, chili paste, ginger, and sugar to the cabbage mixture and mix well.

            3.  Pack the mixture into a clean 1-quart canning jar.  Add enough brine to cover the mixture and fill to the top.  Cover to exclude air.

            4.  Set the jar on a saucer where the temperature will remain constant: 65° to 75°F is ideal.

5.  Begin tasting after 3 days and refrigerate when the kimchi is pleasantly sour. The kimchi continue to age and develop flavor. Store in the refrigerator.  It will keep for several months.


Recipe adapted from The Pickled Pantry.  ©2012 Andrea Chesman.  All rights reserved.

Love Your Roots!

My son took over a large part of my vegetable garden this year.  The plan was that he would grow storage crops, while I got to experience life as a CSA member.  Both experiences were great.

But now we are flooded with roots.  There are sixty pounds of carrots chilling in my extra refrigerator (The basement steps where I’ll store my root vegetables is not cold enough yet.).  I have onions, potatoes, beets, and Gilfeather turnips – some farm-bought, some homegrown.  

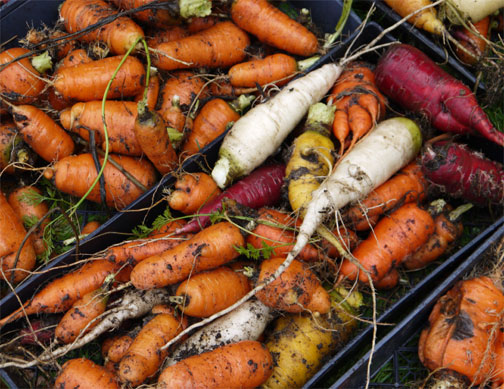
The carrots are weighing heavily on my mind right now.  I usually use up about one pound a week.  The sixty pounds he harvested?  More than we need.  My son thinks I should make carrot soup more often.  I’ll be roasting them for sure, adding them to soups, grating them into salads, and even pickling some of them them.  Turns out the rest of the family really loves cooked carrots (though not met) and would be happy to have them show up more frequently at the dinner table.

Sixty pounds of carrots


But back to the carrots. I wasn’t aware of the varieties, or I would have plundered the Little Fingers and Tonda di Parigi earlier this summer when they were at their optimal sizes.  You see, my son swapped seeds with friends and didn’t tell me he was chosing to grow some of the carrot varieties past optimum size because he couldn’t figure out how he would store them. In any case, here’s what I know about the carrots he grew:

Little Finger.  Developed in France for canning and pickling.  Nice orange color; should have been harvested when about 3 inches long.  

Tonda di Parigi Carrot. A 19th-century Parisian heirloom, deep orange, best harvested young, creamy and sweet when cooked.  

Kuroda.  An 8-inch long, deep orange, carrot with a blunt tip. Supposedly very good for juicing. 


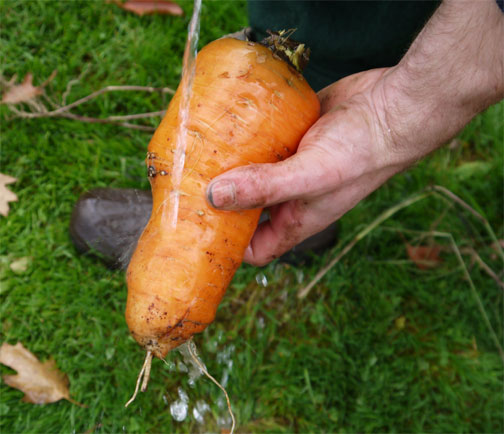
This one is a monster.

Danvers 126 Half Long Carrot.  The Danvers variety dates back to the 1870s, and this strain was developed in the 1940s.  It’s an American classic. 

Red Core Chatenay.  No red core at all, but a standard, classic 5- to 7-inch carrot with smooth sides that taper to a blunt tip. 

Atomic Red Carrot.  It’s beauty is only skin deep, but the carrot is theoretically very high in lycopene, which has been shown in studies to help prevent several types of cancer. 

Scarlet Keeper Carrot.  A lovely orange carrot that is supposed to store very well. 

Napoli Hybrid. An extra-sweet carrot with a fine texture. 

As my son harvested the carrots, he carefully separated them in trays, casually rinsed them with water from the hose, and refrigerated as many as he could.  The remainder went onto the too-warm basement stairs.  I thought the dirt that was clinging to them was sucking out moisture.  So I washed them and bagged them, and in so doing, destroyed his classification system, and now we aren’t sure which carrots are which. 

Last night I was cooking some Chinese dishes, so I made a carrot pickle to go with it all.  I usually make this pickle with a mixture of carrots and daikon radish, but our daikon radishes all went into the compost pile.  These daikon grew to enormous size, bolted in the heat, and developed all the sharp, sulfurous flavors of a turnip and none of the sweetness that would balance it. No problem, though; carrots only work just fine.


Chinese Spicy-Sweet Pickled Carrots.

Chinese Spicy-Sweet Pickled Carrots
Makes about 1 quart 
1 pound carrots, cut into matchsticks2 teaspoons salt1 cup water½ cup sugar1/3 cup mirin1/3 cup rice vinegar¼ cup distilled white vinegar6 thin slices fresh ginger 1 clove garlic, sliced1 dried red chile

1. Combine the carrot with the salt in a bowl and mix well.  Cover with ice water and let sit for at least 2 hours, up to 6 hours.

2.  Combine the water and sugar in a small saucepan and heat, stirring, until the sugar completely dissolves. Remove from the heat and stir in the mirin, rice vinegar, white vinegar, ginger, garlic, and chile. Let cool to room temperature.

3. Drain the carrots and pack into a clean pint jar. Strain the brine, discarding the ginger and garlic and pour in.  Add the dried chile, if desired. Seal.  Best flavor will develop if you can allow it to cure for at least 1 week before eating.  

Adapted from The Pickled Pantry.©2012 Andrea Chesman.  All rights reserved.

On the Road with Pickles

I’ve been taking my pickle show on the road ever since the Pickled Pantry hit the bookstores in June.  I’ve visited bookstores, taught cooking classes, and performed demos at festivals. 


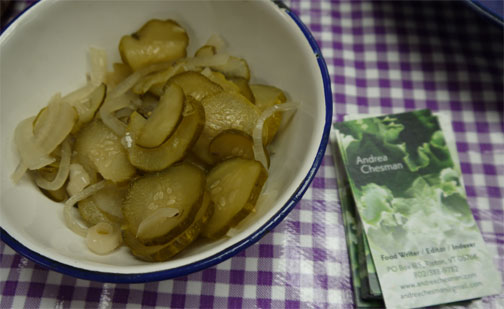
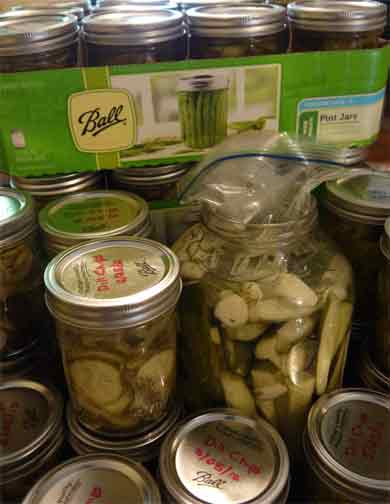
 Part of my show on the road. These are Dill Chips

People who want to promote their cookbooks must bring samples with them of foods to taste.  (One envies the novelists who simply have to read from their works.)  But bring pickles I do.  For most of the summer I have brought my No-Fail Half-Sour Pickles (see post, June 8), not the least because it is a no-fail recipe.  It also makes a darn fine pickle.  But now that it is fall my attention turns to recipes utilizing cabbages, carrots, and daikon radish.

When I take my show on the road, I find myself explaining why I wrote another book on making pickles when my 1983 book, Pickles and Relishes, still sells well and contains some very fine recipes.  (Hopefully, I recycled all the good ones in the new book—or at least all the favorites).  Pickles haven’t changed over the years, but our interest in pickles have. For every pickler who just wants recipes to deal with garden excess, there are picklers who are interested in exploring traditional ways vegetables and fruits are pickled in other cuisines.  


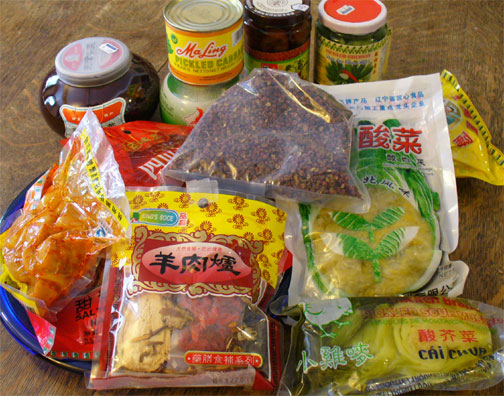
On a pickle trip to Montreal's Chinatown, I loaded up my cart with mysterious looking pickled vegetables—all research for The Pickled Pantry


Curtido is my favorite pickle of the moment.  It is called the Salvadoran version of sauerkraut but the flavor profile is so different that calling it “sauerkraut” does not do it justice. Curtido is a lightly fermented cabbage and flavored with onion and oregano.  It is the traditional Salvadoran accompaniment to pupusas, which are cheese- or meat-stuffed pancakes made from masa harina (the same dough from which torillas and tamales are made).  Not surprisingly, curtido makes a great topping for fish tacos – it also makes a wonderful salad.


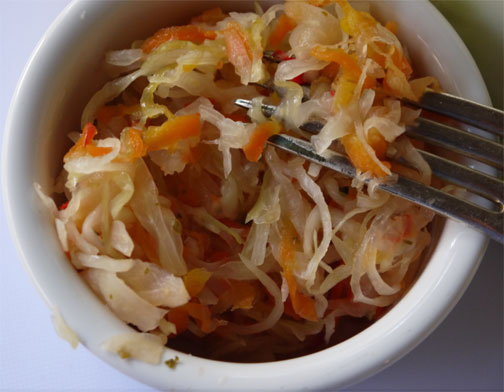
A bowl of Curtido

Curtido
Makes 1 1/2 to 2 quarts

2 pounds green cabbage (1 small to medium head), cored and grated or thinly sliced 

2 carrots, grated

1 onion, thinly sliced

2 fresh red or green jalapeños, seeded and finely chopped

2 teaspoons pickling or fine salt

2 teaspoons dried oregano (preferably Mexican)

Optional Brine

1 teaspoon pickling or fine sea salt

1 cup water

1. Combine the cabbage, carrots, onion, and jalapeños in a large bowl. Add the salt and mix well.  Let stand for 30 minutes.

2. Using a potato masher or your fists, pound and press the vegetables until they release their liquid and are quite wet. Add the oregano and toss to distribute. Pack the mixture tightly into one or two clean quart canning jars or crocks, tamping down on the vegetables with a wooden dowel or your fingertips with as much force as you can until the level of liquid rises above the vegetables. 

3. If the vegetables do not make enough liquid to cover the vegetables, add the optional brine.  To make the brine, combine the salt and water.  Heat until the salt dissolves.  Let cool to room temperature before adding to the jar; you should not need more than a couple of tablespoons, but it depends on the surface area of your container.

4. Weight the vegetables to keep them submerged. Cover the jar to exclude air. Set the jar where the temperature remains constant; 65° to 75°F is ideal. Let ferment for 2 to 3 days.  Taste; when pleasingly sour, refrigerate.

It's a Book!

The Pickled Pantry is here!  thumbnail imageAnd now my summer truly begins.  I am planning to take my show on the road and bring dilly happiness to folks at book stores, festivals, farmers’ markets, and cooking classes.


Over Memorial Day weekend I pickled a case (that’s 48 pounds) of pickling cucumbers into dill chips, bread and butters, and curry chips. I have 60 pint jars of pickles aging in a corner of my dining room.  Then I bought another 5 pounds of cukes and made a gallon of half-sours, which I hope to be ready by Sunday, June 8, when I take part in the Grand Opening of Phoenix Books in Burlington, Vermont.
60 jars of pickles plus a gallon of half-sours
People often ask how long it takes to write a cookbook like this, which has about 150 recipes.  The answer is usually, “All my adult life.”  If the book covers a subject I care passionately about – cooking vegetables, making pickles, preserving – then, truthfully, I’ve been at it since I left my mother’s house, a long, long time ago.  

Pickles got me started as a cookbook author.  As the newly anointed cookbook editor for Garden Way Publishing, which specialized in books about gardening and other self-sufficiency, homesteading skills, I was looking for someone to write a book about pickling.  When I couldn’t find anyone, I said to the publisher, “Heck, I could write it myself.”  That book was Pickles and Relishes: 150 Recipes from Apples to Zucchini, and it was publishing in 1983.  Then Garden Way morphed into Storey Publishing but I went freelance rather than relocate when the company moved.  My next book was Summer in Jar, which included jams as well as pickles.  That publishing company was bought out by a Christian publisher with no interest in cookbooks.  But I was off and running, writing  and editing cookbooks as a freelancer, writing for magazines, gardening, cooking, and raising a family.

Those first preserving books are out of print. The Pickled Pantry combines the very best of those original recipes with new ones.  Kimchi, anyone?

All along, through busy summers and leisurely ones, I had one quest: to make the perfect dill pickle.  Have I succeeded?  You be the judge. 


 A sample of No-Fail Half-Sour Dills

No-Fail Half-Sour Dill Pickles

Makes about 2 quarts


Vinegar gives a kick-start to the pickling process in these quick and easy pickles, guaranteeing success. If you’ve never tried fermented pickles, this is definitely the recipe to start with. You can multiply this recipe as many times as you like, but these pickles are best enjoyed at 1 to 2 weeks, so it makes sense to make small batches as the cucumber season progresses.


4 cups water

2 tablespoons pickling or fine sea salt

1/2 cup distilled white vinegar

1 dill head or 6 sprigs fresh dill

4 garlic cloves, peeled

8 cups whole pickling cucumbers


1. Heat the water and salt in a saucepan, stirring until the salt is fully dissolved. Add the white vinegar and let cool to room temperature.


2. Slice 1/16 inch off the blossom end of each cucumber.


3. Pack a clean 2-quart canning jar or crock with the dill, garlic, and cucumbers, in that order. Pour in the brine. Weight the cucumbers so they are completely submerged in the brine.


3. Cover the container to exclude the air. Set the jar where the temperature will remain constant: 65° to 75°F is ideal.


4. Check the jar daily and remove any scum that forms on the surface.


5. The pickles will be ready in 2 to 3 days, although full flavor will not be reached for a week. If your kitchen is reasonably cool, you can leave these pickles out for up to 2 weeks. If the brine starts to become cloudy, refrigerate immediately to prevent spoiling. The flavor of the dill and garlic will continue to develop. The pickles will keep for at least 3 months in the refrigerator.


Kitchen Note

If your cucumbers are large, you may want to cut them into spears rather than leave them whole. Spears will pickle faster and more evenly than whole cucumbers.


Adapted from The Pickled Pantry  by Andrea Chesman.  ©2012 Andrea Chesman.  All rights reserved.


March Market Madness

The email arrived in my mailbox with the title “March Market Madness.”  My friend Lauren Slayton had a problem.  She is a market gardener, brilliant baker, and superb cook who sells baked goods, soups, and other prepared foods at the Middlebury Farmers’ Market.  Like many growers trying to earn a living off the land, she finds it necessary to market “value-added” products.  Carrots may be a dime a dozen in the growers’ bins, but Lauren’s creamy Carrot-Ginger Soup is a whole other story.  It flies out of the market.  Likewise her potpies and rustic tarts, not to mention her breads, brownies, and cookies.


Now that it is March, Lauren’s supply of the vegetables she grew herself has dwindled. So she proposed a contest to help her come up with a localvore-inspired recipe for the next market, with extra brownie points (literally, meaning she would include brownies with the prize), if the recipe included onions or garlic, her last remaining vegetables.


 Red onions. Photo by Lauren Slayton

Onions don’t get enough love.  They are a workhorse in the kitchen, the backbone flavor note in many, many soups and sauces.  I don’t think my mother ever cooked a single dinner than didn’t start with “first you sauté an onion.”  But beyond French onion soup and batter-coated onion rings, there aren’t a lot of classic onion dishes.  So Lauren’s market regulars might have been stumped by the challenge.  But I wasn’t.


Just that week, I watched as my last pint jar of Rosemary Onion Confit was opened and consumed on biscuits with some nicely aged goat cheese from Twig Farm in Cornwall, Vermont.  I knew that onions can be the star of the show, so I sent her a recipe that will appear in The Pickled Pantry, which will be out in June.  The recipe makes a delectable, savory-sweet jam or rosemary-scented caramelized onions.  I’ve enjoyed it on turkey sandwiches and used it to as a filling for a pork tenderloin.

 Rosemary Onion Confit on a biscuit

Lauren used the confit as a filling for a rustic tart.  What will this relish inspire you to make?


Photo by Lauren Slayton

Rosemary Onion Confit

Makes 3 pints

            . 

¼ cup extra virgin olive oil

3 pounds onions, chopped

3/4 cup sugar

1 cup cider vinegar

1 tablespoon rosemary

1 tablespoon soy sauce, or to taste

Freshly ground black pepper


1.  Heat the oil in a large saucepan over medium-high heat.  Add the onions, reduce the heat to low, and stir to coat the onions with the oil. Cook, stirring occasionally, until the onions are brown and meltingly tender, about 30 minutes.


2.  Stir in the sugar, cider vinegar, rosemary, and soy sauce and simmer for 5 minutes.


3.  Pack the onion mixture into clean hot pint jars, leaving ½ inch headspace.  Remove any air bubbles and seal.


4. Process for 10 minutes in a boiling water bath.  Let cool undisturbed for 12 hours.  Store in a cool dry place.  


Recipe from The Pickled Pantry by Andrea Chesman.  ©2012.  All rights reserved.